Creating the Website Viewer
Introduction
With the database structure still requiring more thought, this week I put that aside and went ahead to create the website viewer. In order to do this, I had to make a mock-up SQLite database to test it with. I pre-populated it with some example data and it looks like this:
 Note: all the fields are in plain-text in this mock-up. They will be encrypted in the actual database.
Retrieving Data from Database
To display all the websites a user has an account on, I simply just added a JTable. This is so that we can iterate through all the websites in the database and add them to the table one by one. The first stage was to use the SQL statement below to extract the data from the database.
SELECT name,url,username,password FROM passwords
SELECTdoes as it says and selects the data from the columns specified after, each separated by a comma.FROMmeans the data should be selected from the table specified after, in this case passwords
This gives us a set of records handily put into an object of type ResultSet by the java sql library. We can iterate through the ResultSet to extract the fields data by using the getString() method. We can’t return the data one by one so we need to store the data for each record in an Object. Then, we need to add the objects to an ArrayList which we can return.
Creating the Website Class
We will create an object called Website which will hold the data of each record. But first, we must create the Website class which we can instantiate to create an object. We simply create 4 variables making them all private so that they can’t accidentally be modified outside of the class.
private String name;
private String url;
private String username;
private String password;
And, use the NetBeans IDE to generate a constructor, getters and setters methods.
- Constructor - a method that is used to create and object using the following format
new [ClassName]([Parameters]) - Getter - a method to retrieve the value of a variable
- Setter - a method to set the value of a variable
Displaying Websites
We can now loop through the ArrayList and use the getter methods to retrieve the data. We can then add the data to the table as a new row. But first, we must cast the table model of type TableModel to DefaultTableModel using the code below.
DefaultTableModel model = (DefaultTableModel) passwordTable.getModel();
This means that we can now add a new row to the table by creating an object array of the data as shown below.
model.addRow(new Object[]{name, url, username, password});
The table has now been populated and looks like this.

Creating the Add Website Button and Popup
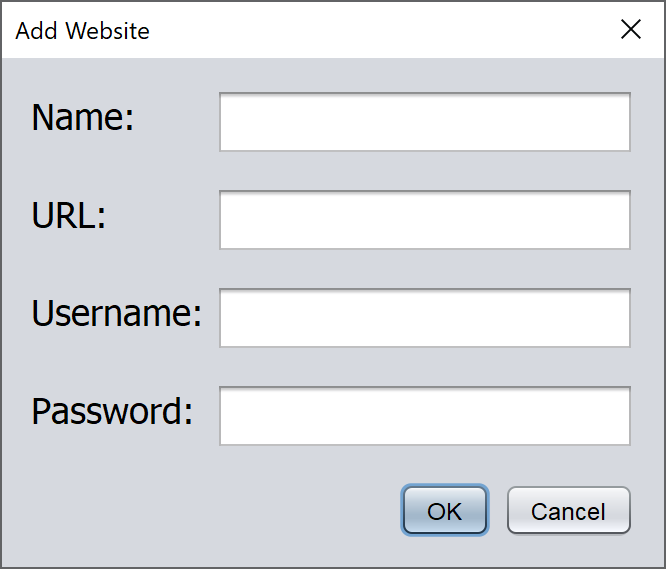
The user can now view their list of websites and credentials, but they also need to add new websites. To do this, I added a button to the page called Add Website which will display a popup prompting the user to enter the data of the new website.
First of all, we need a new JPanel that will be displayed as a popup when the button is clicked. I made this using the NetBeans GUI Editor. Once created, I used the code below to display it when the button is clicked.
JPanel panel = new AddWebsitePopup();
int option = JOptionPane.showConfirmDialog(rootPane, panel, "Add Website", JOptionPane.OK_CANCEL_OPTION, JOptionPane.PLAIN_MESSAGE);
if (option == JOptionPane.OK_OPTION) {
	// Code will go here
}
The first line creates a new JPanel object. The second line displays a ‘confirm dialog’ with the parameters specified in the between the brackets.
- rootPane is the parent pane.
- panel is the JPanel that will be used as the popup.
- “Add Website” is the title of the popup.
- JOptionPane.OK_CANCEL_OPTION means the popup will have an OK and Cancel button.
- JOptionPane.PLAIN_MESSAGE means the popup will have no icon.
The if statement at the end is where the code to add the data to the database will go if the user presses the OK button. I will do this part next week.
The final popup looks like this.
